Showing posts with label DIY. Show all posts

Sunday, January 24, 2016

Let's Get Scratching! Using 'Scratch-Offs' In The Elementary Classroom!

Hi All!
Today's post is all about a 'Do-It-Yourself' project that is sure to spark excitement while engaging your students in meaningful academic practice!

Grab your coins because it's time to...
Get Scratchin'!

Last year I stumbled upon a 'how to make scratch-offs' on Pinterest...but it was geared toward small business owners who may want to include for a 'mystery percent off' on future purchases when shipping goods.

It got me thinking about how I could use it in my classroom and I gave it a 'trial run' to see how easy/hard they would be to create.

You can read about it in more detail HERE on my blog but here is a quick 'how-to' and some pictures of how well it worked in my classroom last February!

You will only need 3 ingredients...
Dish Soap (any brand)
Silver Metallic Paint (can be acrylic or latex)
Packing Tape

I was able to find the paint at a local 'hometown' hardware store, but you can also find it at craft stores!

I used a glass plate for mixing because I didn't want the paint to get 'soaked' into a paper plate.

Watch how easy this is....
1. Print your scratch-off cards
2. Cover the 'scratch-off area' with a piece of packing tape
WANT TO BE SMARTER THAN ME?!
Just laminate the entire sheet of cards!  DUH!
This occurred to me AFTER I cut packing tape into small rectangles!
Plus then the cards would be re-usable for next year- I'd just need to whip up some more 'potion!'

Now it's time to mix up your 'potion':
2 parts paint to 1 part soap (but I will be honest and say I DID NOT measure!)
I just 'eyed' it and used a big fat brush to make sure it all mixed together well!
Once well mixed, 'paint' the area(s) to be revealed.
You want to sort of 'gob' it on so that when it dries there is no 'see through'!

Let it dry 1-2 hours.
You can check the cards- if you can see through then do a second coat.
All of my cards were A-OK after one coat, but I had put it on pretty thick!

Now comes the magic...
What will be my mystery word?!
Use a coin just as you would for lottery scratch-offs:
It has thicker 'flakes' than traditional scratch-offs but kids won't know the difference (or shouldn't!)

Here is how it went in my kindergarten classroom last February:
I made it a center for the week leading up to Valentine's Day.
They picked a card from a heart-shaped basket (not sure where that picture went!).
I had a cup of coins for them to use for scratching and then they used it in a sentence.
They LOVED that they got to glue the card to the paper to take it home too!

LOOK at all the sentences they wrote using their 'mystery word!'

THEY LOVED THIS!
They asked for 'mystery words' repeatedly after this activity!

They loved it so much I made scratch-offs as part of their Valentine gift:

It went into a baggie with a Smencil and some Smarties candies:
They took them home to scratch and then had to bring it back to me to redeem their prize!

I PROMISE making these scratch-offs DID NOT take a lot of time!
The most tedious part was covering the spaces with packing tape- but that can be avoided by just throwing the entire sheet of cards through the laminator!

Maybe your students are beyond practicing sight words and you are wondering how to use them in your classroom?

How about:
1. classroom incentives (Do 'X-Y-Z' and earn a scratch-off!  You determine the prizes so you can cater it to what you have!)

2. reading log incentives (Read so many books/for so many minutes and get a scratch-off!)

3. participation or attendance in classroom events (this could even work for parent/teacher conferences or open house- attendance gets you (or your child) a scratch-off!)

4. word work centers (vowel patterns you are working on, vocabulary, spelling words, etc)
The scratch off could also determine what they do with their weekly words that day (rainbow write, write 3 times each, use in a sentence, etc!)

5. letter and/or word to picture match activities (scratch the word and find the matching picture in a pocketchart- great for CVC words or beginning sounds!)

All you'll need to get is some soap, paint and tape or laminate because I am giving you the cards and recording sheet for FREE in this download!
I also included the Valentine bag topper pictured in this post if you would like to use that idea for gifts!
The download will included pre-programmed frog word cards, as well as a sheet of blank cards that you can print/write additional words you may want to use!
It also has the monkey gift cards- programmed and blank sheet too!

I used KG Red Hands font for my words.  It is free for personal use and can be downloaded HERE.

And don't forget to check-out last year's Primary Pack 'Valentine's Day' theme post from me...
Dancing Hearts Experiment if you are in need of some 'love'-ly scientific fun!
 

 Hope you and your students have fun scratchin' and wishing you all a 'love'-ly Valentine's Day!
Until next post,

Friday, November 20, 2015

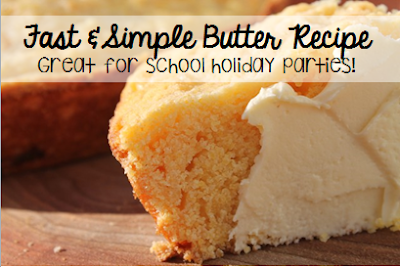
Let's Make Butter! {Class Activity & FREEBIE}

Hi friends! It's Gina from Teaching With Heart (formerly Miss Peluso's Kindergarten) here today with a fun and SIMPLE Thanksgiving-ish recipe! Grab yourself some corn bread because it's time to make BUTTER!
We have a blast making our very own butter in our class each November! Here's the low down on how to make it happen with your kiddos:
Pour about a half inch of heavy cream into small container. SEAL TIGHTLY! (This is why I recommended getting containers with twistable lids. I could not find any last year, so I just bought small tupperware, and made sure the top was sealed on with lots of packing tape. You don't want the cap to fly off and have heavy cream all over the place!
Let your kids SHAKE and keep SHAKING the container! It will take about 5-7  minutes for the butter to form. I like to put on some fun music during this. I set a timer, and each person at the table gets to shake for a few minutes. Allow students to switch hands because they will get tired!
All of a sudden, they will no longer hear the marble as they shake. That's a sign that butter has formed! When you open the container, you will still see some liquid. Just drain the excess cream and scoop the butter out (leave the marble!). 
You and your kids will be all set to enjoy some homemade butter with your corn bread! What a nice treat to end the day before Thanksgiving break! {It really is delicious!}
If you're working on procedural writing, here's a simple recording sheet to help your students document the steps of making butter! Click here to grab it for FREE!
Happy Thanksgiving, everyone!


Sunday, November 8, 2015

DIY Turkey + Free Poem

Create a fun turkey learning manipulative for the fall season! Use the turkey to bring excitement and fun when practicing basic skills. It helps bring a little magic to the mundane!

If you are crafty, break out your foam and glue gun and transform a plastic container into an interactive turkey. Get the directions to create the turkey from a Cascade container here.  Have an extra plastic bucket? Get the directions to make that turkey here.  

Want an easier project? Just print, cut & use a turkey for an easy interactive center/activity!
Kids can feed the turkey to practice so many skills. I made up a little rhyme to go with the game. You can get your free copy of the poem here.


Using an animal to feed makes basic skills practice so much fun!
Use in a whole group or small group setting. You can pass out cards and have kids examine their cards to determine whether their card shows the matching skill. Whoever has the matching letter, sound, or number gets to "feed" the turkey.
I made up a little rhyme to bring more excitement to the turkey game. You can get your free copy here.
 You don't need to be crafty to make your own turkey to feed! Just find a picture of a turkey and cut it out. You have a two options to make your easy turkey.
 To make the magnetic center, you will just need to attach your turkey to a cookie sheet. This provides a magnetic surface for kids to attach the matches. I attached my cookie sheet to a Mini Magnetic Stand that I made out of PVC pipe. You can see the DIY directions here.

Students can then use the magnetic surface to attach the matches and "feed" the turkey.  You will do the same thing to make a turkey for the pocket chart. Find, print, and cut for the pocket chart. You are ready to roll!

The turkey on the cardboard box is just as easy. Just print or cut out a picture of a turkey. Find a cardboard box and cut a hole in the side with scissors or a box cutter.
 I glued paper around the hole, because I was in a rush and created a raggedy hole. I wanted to cover my mistakes with paper and glued the pieces of paper around the sides or the hole.
 Glue your turkey onto the box and add the poem. Your turkey is ready to join your kids for some fun! I hope you enjoyed these ideas.
 You can get all the turkey pictures, poem, and cards a in my Turkey Time pack. The Turkey Time pack will be 50% off this week for Markdown Monday! Hope you all have a wonderful week :)


Monday, August 24, 2015

Back to School Teacher Hacks!

Hi All!
It's Jenn from Crayons and Cuties In Kindergarten and I am here today with some 'DIY' goodies for your classroom that are not going to kill your very depleted wallet!  Grab your scissors, tape and ribbon...we are about to have some fun!

I know many of you are already in school and sweating out the 'beginning of the year' crazies...that will be me in one short week!
So I have been busy getting my classroom ready and new goodies prepped for a year of fun!

Teachers are NOTORIOUS for creating something new from something 'old' and/or out of ABSOLUTE necessity!
My mom used to always say, 'Necessity is the mother of invention.' 
I never really understood her phrase...now as a teacher and mom I do!

So today I am here to show you two teacher 'hacks' I will be using in my classroom this year!

I found the idea about cutting notebooks in half on Pinterest- but added a little twist- which I will get to in a bit!

First for 'how to' on the books:

Well I am happy to report that I am typing this post with ALL 10 FINGERS after this 'project!'

My hubby didn't mind breaking out all his 'man tools' to help me out with a few projects for this school year- one of which was chopping these 50 cent notebooks into 2 for me!

I had read Home Depot will cut them for you, but didn't want to 'deny' my hubby the chance to help!
We did find that the best way to cut them was with the 'open part' of the book facing toward you.  

I have also read that if you don't have access to power tools OR a Home Depot, you can open the books and use a heavy duty paper cutter to slice them in two.

So now I had 50 notebooks for the price of 25!

WHY cut them in half?
Because I find my kindergartners never use the whole page and I felt like so much of the notebooks were being wasted!

Now we will have a math journal (plenty of room for our simple & quick responses/entries) and a readers/writers notebook.  (I will still have a FULL notebook for each child to use as a writing journal).

The Readers/Writers notebook will be used for:
*responses to books we listened to/read on our own
*practicing letters/words
*responses to mini lessons
*recording in our notebook what the class is doing whole group during interactive writing
*small group reading group responses

We can even take it outside with us to record what we see during science!

Now to the 'twist' that I am so excited about!

Last year we lost our full-time teaching assistants due to budget cuts.
It was a HUGE adjustment for me since I have always had a full time aide.
One of the things that was hard was making sure EVERYONE was on the right page but without losing anyone to 'the sillies' as I walked around!

I would always say 'Go to the next blank page' BUT....it didn't always work out so well!

As I was reading a book with my sons this summer that had ribbons as place markers in the book, the idea came to me!  Add a ribbon 'place marker' to the notebooks!!

So here is how...
I bought a spool of thicker/heavier ribbon at the craft store and found that 10 inches will be perfect for the mini books (if you are doing this on a full size book, just double everything I have measured!)

To make sure the ribbon stays all year with all the tugging it will get, I used 'Gorilla Tape' duct tape!  I measured a 4 inch piece and put the ribbon about half way down.

Next- place the tape/ribbon combo onto the spine of the book making sure the tape lines up with the top of the book and then fold it around to secure it.

Because I am using 2 mini books, I wanted to color-code my books so the students can easily find the one we need ('Go get your yellow book.').  I added a piece of colored masking tape (found at Michaeals) on top of the black gorilla tape.

SO NOW.... 
The ribbon will help them find where they 'left off' in their book so that we are all ready for the next day!

Now if you are like me, you are going to pin one of the images and say 'oh I'll remember that' and then look back at your Pinterest board and say 'What was that again?'  So I made this quick reference image for you!  Simply pin this one and it'll automatically refresh your brain! 

So now where am I going to keep these notebooks...along with their journals, Fundations workbooks, writing folders, etc.?!

I had ALWAYS had buckets with all these things and my TA and I would hand them out...well...it was just me last year and I felt like I wasted more time than I should have just handing out materials.  So this year I was determined to come up with a system to make the kids more independent.
Earlier in the summer I saw a post about Dollar Tree having cardboard magazine file boxes..but since I didn't need them until August, I put off ordering them.
WELL...guess what...they are OUT OF STOCK now!
So I searched other retail office supply stores and they are REALLY expensive (upwards of $2-$5 each!!)...and my wallet is pretty drained from a summer of no paycheck and fun!

It got me thinking....and as I ate my cereal just the other day I was staring at the box and the light bulb came on!

I got to work...it literally only took me TOPS 5 minutes to make one...and that is with me 'figuring out' the measurements!

You are going to need to make sure you have a box that holds at least 17oz of cereal...the smaller 11.5oz box wasn't tall or wide enough!

Here is my 'how to':
4.5 inches gives a good base so that nothing falls out or 'tips' the box!

Starting at the mark you made at 4.5 inches, use a ruler to make a diagonal line across to the opposite top corner of the box.
 

Next is to trim off the 'flaps' on top BUT don't forget to save your box tops!
AND look at this FABULOUS box top container I have thanks to Primary Pack's own Mrs. Payton!


This was probably the trickiest part...cut down from the top of the box to the 4.5 inch marking on both sides.  Trim a bit off  but keep some so that you can fold the excess into the box.  This will help keep it sturdy and give it more power to combat the abuse it will endure during the year! 

Next, score the diagonal lines you made using a scissor- this will make them easier to fold!

You cut just cut those parts off, but by folding them in you are giving the box more strength!

And then secure all the folded parts inside the box using packing tape. 

To personalize the box, simply peel/stick a 2x4 shipping label to the front!  It will fit perfect!  You can even first personalize them on your computer (just remember to change the text sideways) if you want a more 'professional' look!

Now the once cereal box is ready to... 

OR...


ONE problem...how am I going to eat 20+ boxes of cereal?
So I am going to send this note home the first week of school: 
(click to download a copy)

We won't need the boxes the first week, so I can gather them from parents and work on getting them all ready for the next few weeks as I introduce how to use the books and how to care for our supplies!

Wishing everyone as wonderful 2015-2016 school year!
Until next post,