Saturday, February 28, 2015

Directed Drawing with Go Noodle and Rad Chad

Hi friends!  It's Kristen from Easy Teaching Tools and I'm happy to team up with Go Noodle to bring you a fun art project that your students will love! We are a complete Go Noodle classroom!  We use Go Noodle to transition from journal writing to phonics and our read aloud to math.  If I forget our brain break, they most definitely will remind me! My friends beg for Go Noodle and have many of the brain breaks memorized.  Since my students love art, especially directed drawings, I thought it would be fun to create one using our latest champ, Rad Chad!
Students grabbed a piece of white paper and a black sharpie and we got to work.  I know what you're thinking, "A sharpie, what if they make a mistake?"  I always tell my kids, "There's no such thing as a mistake when we're doing art!"
 I've found that directed drawings work best using a doc came and, a quiet classroom, and a little Jack Johnson.  I always remind my friends that the purpose of a directed drawing is to have fun and to follow directions.  Some times I'll give directions orally as I draw or sometimes, when I really want them to focus, I'll just draw a step and have my kiddos copy it.

Tip #1
There is a way to eliminate students always asking, "Is this right?"  Set your expectations beforehand.  After every few steps, have students hold up their artwork so you can scan the room quickly to make sure students are on task and following directions.  This is a great time to give compliments!

The whole drawing process took my 2nd graders about 10 minutes.  They looked a little scary at first, but once we added some watercolors, they looked like Rad Chad, I promise!

 Tip #2
Since you'll only need two colors, you can pour a little paint into a bowl and add some water to make your own watercolor!  If you want a bright background, just have your students add a different color for a POP!

Tip #3
Add your students' art to a memory book or a bulletin board for a great pop of color.

My kiddos were absolutely ecstatic about this project.  Here are some sweet things my friends said:
"Thank you so much for letting us do art!"
"I wish we could tell Go Noodle how much we love making Rad Chad!"
"This is the best day EVER!"
I'm not making this stuff up, friends!

If you want to share this art project with your class, grab the step-by-step directions for  for free!  You can also see the original post over at Go Noodle.
post signature

A Few Simple Steps To Differentiate Writing (AND A FREEBIE!!)

Hi everyone!!

Alisha from Missing Tooth Grins here! Do you love to teach writing? I will be honest, I used to loathe writing. Actually, just in November, I asked my instructional coach and principal for some advice on my writer's workshop time. Then, I did a ton of self reflection on my own over that following weekend of asking them and figured it out on my own like a big girl. Hehe, just kidding.

First, I wanted to figure out exactly what the problems in my classroom were. Just a quick note, I teach first grade and was feeling this way from the beginning of the year until November. 

1. They can't write.
2. They talk the whole time.
3. Stamina... Where is their stamina?
4. This kid is basically a published author and this kid over here needs help with sentences. Help. Me. 
5. This makes no sense. 

Anyway, I'm no expert on anything honestly, but I do feel pretty strongly about the ways I teach writing. If you feel like you are in the same boat I was, then I hope you find this post useful to you! So... Introducing... EASY STEPS TO DIFFERENTIATE YOUR WRITING! The most important thing for me to remember while teaching writing is that my kids are literally all at different areas in their writing and THAT'S OKAY! I hope these few easy steps can help you like they've helped me!

When teaching opinion writing, it was very obvious to me that some kids would be able to write three or four reasons to support their opinion, while a few of my friends would only be able to write one or two reasons. Rather than stressing my friends out that they all had to write the same amount of reasons, I gave each friend a post-it with a number. The number stated how many reasons they would have to have to support their opinion. This could work for any type of story, not just opinion stories. I could see myself using this for informative writing and narrative writing as well. 


This friend decided to color on her post-it, but as you see... Easy Peasy. I just walked around with my post-its and sharpie and wrote and stuck! Wrote and stuck. Wrote and stuck. That reminds me of Legally Blonde... Bend and Snap (anyone?)!

One way that my friend Katie from Simply Creative In Kentucky shared with me is another super simple way. The kids use a post it to track their writing in their organizers or rough drafts to their stories. That way they don't lose track of where they are in their writing... Something that my kids used to do all the time, which made rough drafts and final copies extremely difficult. Look at this super simple trick!


Another way is to make sure you're conferring with your students. I was so wishy-washy about this before, but I totally believe in having meaningful conferences with your students. Each day, I sit down with about 3 or 4 students, if it's realistic that day (you know how that goes) and we discuss their previous goal, whether they've been working on that goal, and a new goal for them to work on in their writing. Remembering to remind them to look back at their goal daily is a challenge, but making those goals has definitely shown a difference. I mean to get this picture for you all, but I promise I will do a separate post on conferring one day! Blogger fail on my part. Sorry!

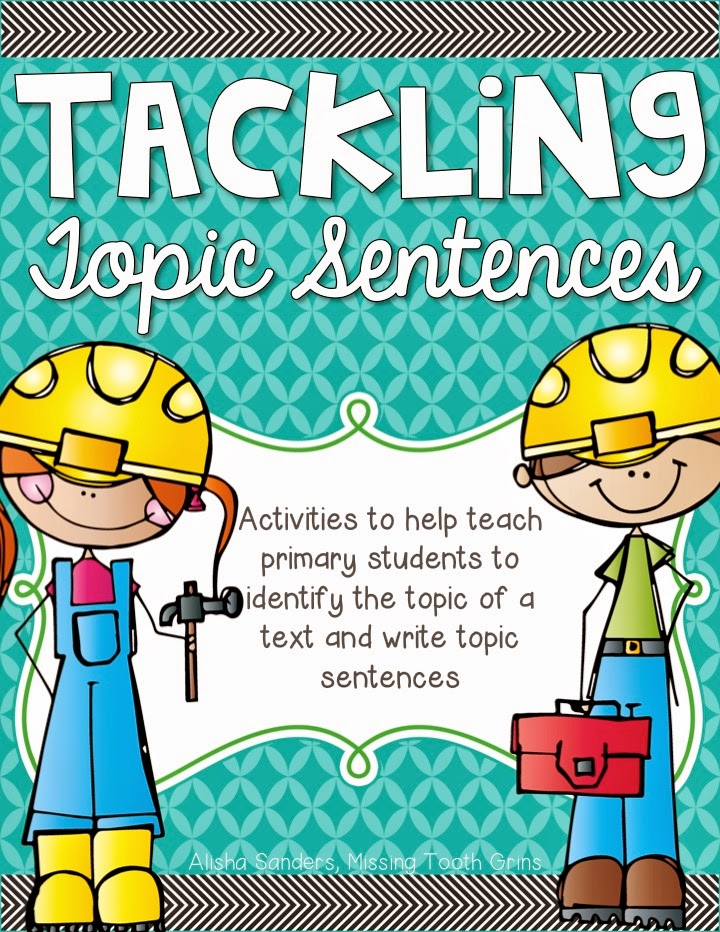
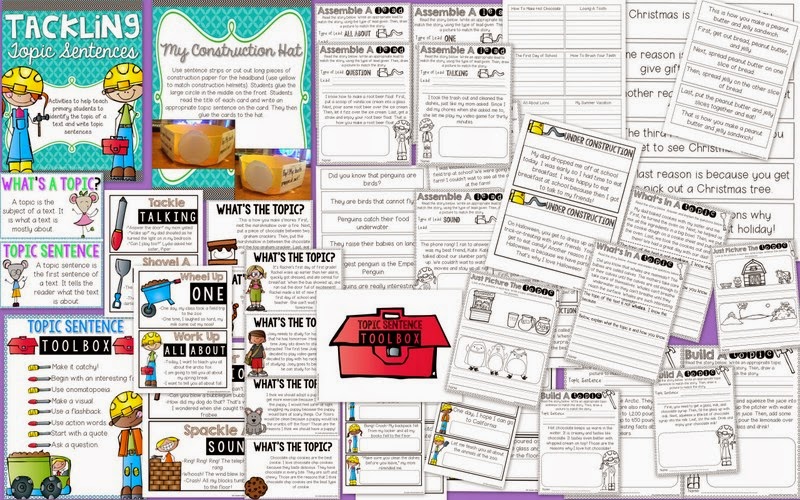
This last one has more to do with teaching topic sentences, but my students had a really difficult time with identifying a topic sentence and creating their own topic sentences. We used my Tackling Topic Sentences pack and highlighted the topic sentence in different stories. This really helped them see a visual for identifying the topic sentence (and generally the main idea) of a text, which in turn helped them create their own.
 In fact, they created this one together as a class when we read A Pig Parade Is A Bad Idea. You can read more about how I taught opinion writing in this post right here. Sentence starters are something else I always make sure to have for my friends that need them. Some of my firstie friends need sentence starters, while others don't.
Here's the pack I used to teach topic sentences. 

https://www.teacherspayteachers.com/Product/Tackling-Topic-Sentences-1652261

https://www.teacherspayteachers.com/Product/Tackling-Topic-Sentences-1652261

So, there it is! Some simple easy steps to differentiate your writing and hopefully help you and your kiddos! It helped me and my firsties a whole bunch!

And, because I love all our followers here on The Primary Pack so much, I created a freebie of this pack because of this post! You can find it in my TPT store or by clicking on the picture below! Enjoy!!

https://www.teacherspayteachers.com/Product/Tackling-Topic-Sentences-FREEBIE-1736981
 

Friday, February 27, 2015

Keep Your Kids Learning on SNOW DAYS!

Hello there!
 Happy Friday, and thanks so much for stopping by!
It's Amber here from Mrs. Masters Kinder Love!
http://mrsmasterskinderlove.blogspot.com/
Anyone else completely and totally OVER winter?!
I am going to go ahead and assume that I am not the only teacher that has had a million and one "cold" or "snow" days! We have officially had 8 days off and quite a few delays too. We ran into this same problem last year, and our district ended up providing "Blizzard Bags", which are learning assignments for the students to complete at  home. These assignments become available on the district website, once the school decides to close. This year we changed from calamity days, to hours, and therefore our students do not have to complete blizzard bags. However, starting on our first snow day this year (yes, it was in November), I decided to share Snow-Day Learning Opportunities with my Kindergarten families, that would encourage my students to "think"...even on their days off. 
Now, you may be wondering.....
What do these learning opportunities look like?
Answer: Well, it can look completely different for everyone, depending on the resources you and your students have available at home! 
Things to Consider:
  1.  How will you communicate these assignments with families? 
  2. What resources do your families have available at home? (internet access, writing supplies, etc.)   
How I Made It Work for My Classroom:
1. I started by creating some documents with easy learning opportunities on them! I tried to provide ideas that used supplies that I knew the students would have.   However, if you know all of your students have internet access, you could easily provide links to resources to use online. Here is an example of one of the learning opportunities I provided. I think it's important to note that I'm not trying to cram a bunch of tasks into a snow day. I'm simply providing some ideas for conversations and learning that will get my students thinking on their day off.

You can easily create a document in Word or Powerpoint and then convert it to a pdf. Easy peasy!

2. Since the beginning of the school year, I've been using Remind , which is an app to send text messages to parents. The awesome thing about remind is that you never exchange phone numbers. It is free and is super-easy to use! It helps me send class text messages easily and safely. 

 I use Remind by attaching the PDF that I created, and sending it in a text message. I have found that more students take part in the learning when their parents receive the ideas straight to their phones. However, you could also email your PDF to the families.

Here is an example of what my message looked like when we had a snow day in November. This is exactly as parents would see it on their phones. 


 3. Now some of you may be worried that you have to create these BIG documents every time there is a snow day, and what if you really want to sleep in?!  My advice is to spend 30 minutes one day and create multiple, so that they are ready to send on a day off. 
 Again, easy peasy! 
AND if you really want to sleep in...just sleep in and send it when you wake up! :) 
To help get you started, I've added a couple of mine from this year that you can use on your next snow days! Remember,  I teach Kinder, so these may not be suitable for your kids, BUT it is so easy to create your own, customized learning opportunities in minutes! Just click on the picture to download your copy and then you can attach it to emails or text messages! 
Enjoy!
https://www.dropbox.com/s/ptjo3kddux51v6m/snow%20day%20learning%202.pdf?dl=0

https://www.dropbox.com/s/qfisfq0342qgkgr/snowday%20jan26.pdf?dl=0

I am so happy that I started sharing these learning opportunities with my kindergarten families. The parents have loved receiving simple, learning opportunities to share with their students on these winter days and I have received wonderful feedback! I hope you'll try this out in your classroom! :) BUT maybe not until next year since Winter is obviously over....right?!
Have a fabulous weekend!


Thursday, February 26, 2015

Skill-Based Fluency Instruction

Hey everyone! It's Meredith from Creativity to the Core. Do you focus on fluency in the classroom? Fluency is a BIG focus of mine at the moment. One of my final practicum projects this semester is focused on all things fluency.  So, today, I am sharing some of the fluency knowledge I have gathered for my graduate courses, and giving you some ideas for hands-on fluency skill-based instruction in the classroom. Get ready for some research-based information followed by lots of fun pictures! Ready???
Fluency Overview
            In the past, fluency was defined as the ability to read smoothly and effortlessly, at a quick, automatic rate (Harris & Hodges, 1995; Logan, 1997). A student’s reading rate and accuracy are very important because less time spent on decoding leaves more time for the brain to focus on comprehension. However, after recent research, fluency has come to encompass much more. It now includes prosodic elements such as expression, volume, phrasing, pacing, and smoothness. When students read with prosody, they are able to capture the meaning of the story or script. Current research supports phrasing, pacing, and smoothness as elements that help develop fluency in students. (Clark, Morrison, & Wilcox, 2009)

            Students who do not read fluently segment the text and read it word by word. However, students who read smoothly with appropriate expression, pacing, and phrasing make reading sound like natural language (Zutell & Rasinski, 1991). Fluent reading develops when students are able to make their reading sound like individuals speaking as they do in daily life.

            Although fluency is a large part of reading curricula, it is often neglected in reading instruction (Reutzel & Hollingsworth, 1993; Zutell & Rasinski, 1991). Many teachers refer to traditional methods of measuring fluency. This is usually comprised of giving students an unfamiliar passage and timing their reading while keeping track of errors. Research has shown that varying the fluency practice is beneficial in the classroom in order to motivate those students who are not motivated by competition (Tyler & Chard, 2000; Worthy & Prater, 2002). Repeated readings of familiar texts are necessary in order for fluency, and therefore prosody, to increase.


Fluency in My Classroom(s)
            If you teach primary grades, then I'm sure you are used to the Oral Reading Fluency (ORF) Assessments or something of the sort. These are short stories that we ask students to read while we time them and note any mistakes. Last year, I had very high first graders who already read fluently, so our ORFs were easy to administer. I didn't stress about them. I simply tested my kids, plugged in their scores, and clicked submit.
            Fast forward to this past fall. During the first half of the school year, I taught in a private school. One of the small groups that I worked with consisted of first graders who were struggling readers. Fluency was....not quite their strong point. 
            Fast forward to January. I transferred back to the public school I was at previously. I now work with third graders, many of whom are at a lower level than the first graders I had last year. So I began to ask myself....What are they missing?
            After attending a training in Orton-Gillingham, {LOVE! If you ever have the chance to go, GO! Run! I recommend it over any conference I have ever been to!} I was convinced that students (or at least the ones I have worked with) were lacking basic instruction in phonics skills. If I could teach them the skills that they were lacking, would they then be fluent? Could they then comprehend?

Skill-Based Fluency
            I love the idea of fluency practice every day, especially in the primary grades. I have seen the benefits of repeated readings, and the smiles and giggles from successful readers. BUT I have always thought that fluency passages were sort of...random. I'm not saying that they are ineffective. I am not telling you not to use them as part of your curriculum. In fact, many curriculums require them.

Let me just explain my reasoning...
If I am teaching silent E, wouldn't it be great to immerse the kids in silent E? Letting them SEE silent E everywhere they look or read will help them to identify silent E in the future. Right? So, why not include that skill in your fluency instruction?

I began doing this with two different groups of struggling readers, and have seen the positive effects already! We use LOTS of hands-on activities to drive this concept home. The following pictures are from two groups of students - first graders and second graders.

One activity that my students love is this silent E set from the talented Lavinia Pop.
Use sound chips when saying each sound.
Add the silent E with a dry erase marker and use the sound chips to read the word again, changing the vowel sound.
I then ask students to change the onset of the word while keeping the rime the same. Once they have written the word, they cover the onset so that they see the pattern in the rime. They come up with as many words as possible.
            Another day during the same week, we read these Rhyming Poems which are WONDERFUL because they have Elkonin boxes for the rhyme sounds. We use sound chips again here. The students would put a sound chip in the box each time they heard a long vowel and saw a silent E. Then, they would underline the silent E words. In pairs, they would face each other and take turns reading the poem as I listened in and gave advice on pausing and pronunciation of words.

            During the same week, I introduce fluency sentences. Jen Jones {my literacy hero} created these amazing fluency sentences that are organized by skill. AHHHHH! Can you hear the hallelujah chorus?! Perfect for RtI and intervention groups!
Students read each sentence and underline and silent E words that they read. I then have them check with their partner to see if any have been missed. Then, they add any underlines that they missed.
I have the kids whisper read to themselves as I listen in to them one at a time. Then, we read together. Finally, they read to a buddy.
You will see here that this sweetie underlined "the" in the second sentence above. This was a GREAT teachable moment to discuss the fact that "Not every E at the end of a word is a silent E." Use these mistakes to help students understand the reasoning behind the skill.
This student needed more chunking. The text was too overwhelming. I drew lines between sentences and had him only focus on three sentences at a time. He then wrote down all of the silent E words and read them from his white board before continuing to the next few sentences.
            At this time, I am currently working with struggling second graders for my final practicum project. These short vowel fluency passages from Miss DeCarbo are a savior! The kids seriously love spinners, so that's a plus! This set requires students to hunt for words and participate in repeated readings of the text. And guess what!?! They are ALL based on a phonics skill!
This page focused on "ack". The kids were SO excited that the word backpack had TWO "ack" sounds in it!
After completing all of the steps and reading the passage together as a group a few times, students buddy read. They listen for changes in their partner's voice each time there is punctuation.
             Focusing on a skill while practicing fluency has been SUCH a blessing for my second graders. They are not at grade level and cannot handle second grade fluency passages. Using these passages with the same phonics skill repeated over and over again helps the students to read a full paragraph without stopping to "sound out" any words. They know the phonics skill and are able to apply it throughout the passage. After one day, I had these kiddos giggling and reading with expression in their voices. Why? Because the text was predictable and they had confidence in their skill.

As you go off into your classroom this week, think about including your skills into your fluency practice. There are oh so many ways that you can do this. Just keep practicing in a variety of ways, and make fluency fun! As they say, "Practice Makes Permanent!"

Tuesday, February 24, 2015

Long Term Science Investigations

Hi Friends! It's Kristen from Loving Teaching Inspiring. I can't believe my birthday month is almost over?!? I'm seriously wondering how this happen?

I'm currently browsing through TPT and adding a ridiculous number of products to my wish list! I'm sure you've already heard BUT today is the big site-wide sale on TPT. Don't forget the promo code HEROES to snag that additional 10% off.

All the authors here at The Primary Pack are participating & I've added direct links to their stores at the bottom of the post. These ladies are seriously talented & I'm so blessed to be a part of their 'pack'!

Now for science investigations. Do you have a group of kiddos who LOVE science? I know I sure do! However, sometimes it's hard to fit in the science everyday but we try! The easiest way I learned to do this is with a long term investigation.

A long term investigation is just that...an investigation held over a long period of time. Our most recent investigation was created because of the HUGE misconception my class has about the moon. During the day we ONLY see the sun....NOT TRUE! But for these kiddos they need to see it to believe it. And so the investigation began!

Every student gets there very own data log! We start by discussing the purpose of the investigation and everyone makes their own hypothesis.

I try to keep an anchor chart to track our data as well as their individual books.

Next-up it's time to go outside!!! It's almost like an extra brain break too---get up and move!

Afterwards we all get back to work logging our new data. First, we write the date at the top. Then we either cross it out (if we didn't see the moon) or color the moon to match the phase its in! Last we color the thumb to match our picture. This makes it easy for the class to easily count how many times we observed the moon during the day.

Here's where it can get a little tricky...would you believe it that our first week of this investigation we didn't see the moon once! UGHH of course! I found a wonderful resource online to help with "moon hunting" check it out here.

Look how this little boy color coded his thumbs. Adorable. Simply Adorable.

After we finished collecting our data it was time to analyze. We looked back at our class chart and talked about our findings. Then we filled in our conclusion statement and checked our hypothesis. This little girls hypothesis was correct!

My class loves these little investigations. So far this year we've done a decomposing pumpkin, grapes to raisins and now the moon! You can click on the pictures below to grab your own copy of these investigations today for only $2.10 each!
https://www.teacherspayteachers.com/Product/Lets-Investigate-Can-You-See-The-Moon-During-The-Day-1730331https://www.teacherspayteachers.com/Product/Lets-Investigate-Grapes-to-Raisins-1474117
 
Don't forget to shop through all The Primary Pack's store for some fabulous resources!!


One Game...Many Uses!

WOW!  February surely went fast!  I can't believe it is my time to post again!

It's Jenn Drake from Crayons & Cuties In Kindergarten and today I am bringing you a 'tried and true' game I have played in my kindergarten classroom for years!

I have modified it over the years, but think it is finally 'at its best' and ready to share!

It is called 'Blast Off' and it can be differentiated in so many ways that it can be used with PreK-2 students!

I use it primarily to practice reading, writing and using sight words, but I am going to show you how it can be used for many ELA and Math skills!

So what is 'Blast Off' and how have I used in in my kindergarten class?
It is an independent 'game' that can be used as a 'game center,' 'word work center,' 'word study center,' 'ABC center' or more!

It basically consists of this simple 'recording sheet'
and a spinner!
That's it!!!
And it can become a weekly center activity that is virtually no prep on your part!

Students spin, read and find it on the recording sheet and then write!
 They continue to spin, read/find and write until one of the words gets to the top- the rocket- and 'blasts off!'
That word is then the 'winning' word!

Once they have a winning word, I have my students then use the word in a sentence on the back and draw a picture to match the sentence!
 It is SO easy to get it ready for the next week!
I bought transparent spinners that I taped onto the top of CD/DVD cases to make my spinner 'cases' that are re-useable!  I did not 'invent' this idea...I saw it on A Differentiated Kindergarten's blog post!  I purchased my spinners from Learning Resources, but I hear they are now discontinued!  AHHH!  I did find a set on Amazon.  If they are no longer available when you go searching, you can also purchase just the spinner and hot glue it to the top of the case!  Phew!

I print my spinner forms on cardstock and laminate.  I then use a dry erase marker to write the words for the week.  Slip it in the case and it's ready to go!   I don't have to worry about the words 'wiping away' as they spin because they are tucked in the case!  When the new week rolls around, I slip the spinner out, rub the words away (I use donated children's socks as erasers in my classroom!) write in the new words, slip it back in and we are ready for the new week!  SO much less prep than making new spinners each week, right?!!!


So what are some other ways to use the 'Blast Off' center?

Here are just a few ideas!!

And for the visual learners, here are a few pictures!!

Here is an idea for the beginning of the year, review/practice and/or PreK!

Want a way to practice the sound/symbol relationship?!  Add pictures to the spinners and recording sheets (read below for a how-to on this too!!)

Differentiate between 2, 3 or 4 different word families with the different recording sheets!


 My kinders always confuse the /e/ and /i/ sounds- do yours?!  This would be a great way to practice, review and 'drill' in a fun, non-threatening manner!

And for more of a challenge, use it for fact families, addition, subtraction and more!

There are SO many other ways to use them- be creative!!

So I mentioned I would show you how to digitally customize your spinners/recording sheets!
Here's how!
You can choose to print and write or cut/paste if you choose to go that route!

I want your students to enjoy practicing sight words and more as much as mine do, so this pack of 'Blast Off' recording sheets and spinners is FREE in my TpT store!
Just click the cover and download!
You will find spinners and recording sheets for sorting 2, 3 and 4 items as well as all the ideas/suggestions for use, how to set up the spinners and links to the spinner 'parts' and pictures of it in use!
As always, feedback for free downloads is always appreciated!

And....today is also '$2 'Two'-sday!'
Find my Spring Read the Room for CVC/CVCe Words for only $2 ($6.25 value)!
You can find more $2 Today Only deals by clicking here!

While you are on the Teachers Pay Teachers site, be sure to fill up your wishlist...
TOMORROW, February 25th, TPT is having a one day site-wide sale!

Sellers will discount their stores up to 20% and TPT will give you an additional 10% off with the promo code HEROES!

It is a great way to stock up on all the goodies you will need to 'Ring In Spring!' 
(We surely need that this year after the winter we've had so far here on Long Island!!)

The Primary Pack Gals Have Come Up With Some 'Must-Haves' For Your Wish-List!
Be Sure to Check Out These Goodies!

Happy Shopping!
Until next post,